Automation has become an integral part of control room operations, streamlining processes and enhancing efficiency. As the demand for skilled control room operators grows, it is essential to be well-prepared for interviews in this field. This article provides insider tips to help you understand what to expect in an Automation 360 Control Room interview and increase your chances of success.
Here are some commonly asked interview questions and their answers related to Automation Anywhere 360 Control Room. In this Blog we are sharing Top 10 Automation Anywhere Control Room Interview Questions. I hope these questions and answers help you in your Automation Anywhere Control Room interview preparation! You can also visit our official YouTube Channel EasyWay2Learn to know more about RPA tutorials.
Top Interview Questions from Automation 360 Control Room
Explain the steps for run and schedule BOT from Automation Anywhere Control Room?
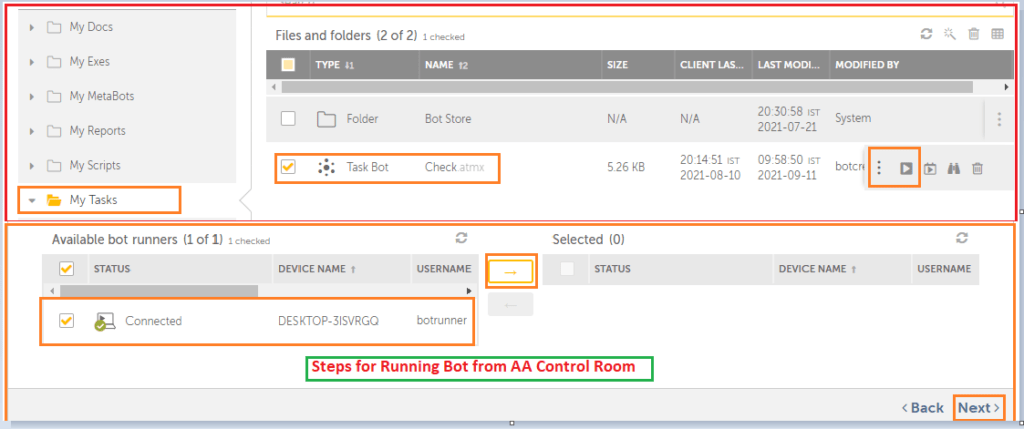
To Run Bot from Automation Anywhere Control Room we need to follow steps as mentioned below.
- First upload the BOT using Automation Anywhere Client including dependent files or sub tasks if any into Control Room.
- Go to Control Room > Bots > My bots > My Tasks > select the Task which you want to run or schedule
- Select Run Bot > Select Bot Runner (from the available List) and click on Arrow to add the Bot runner
- Click on Run Now button to start the BOT.
Steps for Scheduling Bot in Automation Anywhere Control Room.
- Following the steps 1 and 2 as mentioned above
- Click on Schedule Bot and it will take you to the page Called Scheduled Bot
- Select the Schedule type as Run Once or Run repeatedly to select the BOT Start Date and Start Time
- Add the Bot runner from Device option and click next
- Click on Schedule Bot Button in the next Page
You can refer to the attached image to understand the steps in detail.
Why Automation Anywhere 360 Control Room Bad Gateway error comes?
The “Bad Gateway” error in Automation Anywhere Control Room usually occurs when there is a communication issue between Control Room and Bot Creator or Runner server. This error can occur due to various reasons, including network connectivity issues, server load, or incorrect configuration settings.
Here are some steps you can take to resolve the “Bad Gateway” error in Automation Anywhere Control Room:
-
Check network connectivity: Ensure that the Control Room server and the Bot Runner server are connected to the same network and there are no network connectivity issues.
-
Check server load: Check the server load on both the Control Room server and Bot Runner server. If the server load is high, it can cause the “Bad Gateway” error. In this case, wait for some time and try again later.
-
Check configuration settings: Verify that the Control Room and Bot Runner server are configured correctly. Ensure that the correct URL is used to access the Control Room, and the Bot Runner server is added correctly to the Control Room.
-
Restart the services: Restart the Automation Anywhere Control Room and Bot Runner services to resolve any potential issues that may be causing the “Bad Gateway” error.
If none of the above steps resolve the issue, contact Automation Anywhere support for further assistance.
Explain the steps for creating user in Automation Anywhere Control Room?
Here are the steps for creating a new user in Automation Anywhere Control Room:
-
Log in to the Automation Anywhere Control Room as an administrator.
-
Navigate to the “Users” section from the left-hand menu.
-
Click on the “Create User” button in the top right-hand corner of the screen.
-
Fill in the user details, such as username, email address, first name, last name, and password. You can also assign roles to the user.
-
Click on the “Create User” button to create the user account.
-
Once the user is created, you can configure additional settings for the user. Such as access to specific folders or actions.
-
You can also modify or delete the user account from the “Users” section.
Note: Depending on the version of Automation Anywhere Control Room. The steps for creating a new user may vary slightly. Additionally, you may need to configure other settings. Such as access permissions or roles, to allow the user to perform specific actions or access certain resources.
What is secure recording in Automation Anywhere? How and where to setup this feature?
Secure Recording is a feature in Automation Anywhere that allows users to record sensitive data securely. When enabled, it prevents the recording of sensitive data. Such as passwords or credit card numbers, from being stored in clear text in the automation task. Instead, the sensitive data is masked or encrypted to protect it from being accessed by unauthorized users.
Here are the steps to enable Secure Recording in Automation Anywhere:
-
Open Automation Anywhere Client and go to “Options” in the “Tools” menu.
-
Click on the “Security” tab and then click on the “Secure Recording” button.
-
In the “Secure Recording” dialog box, select the “Enable Secure Recording” checkbox.
-
Choose the type of encryption or masking you want to use for sensitive data. You can choose from options like “Masking with Asterisks” or “Encrypt with Password.”
-
Click “OK” to save the changes.
Secure Recording is now enabled and any sensitive data entered during the recording process will be masked or encrypted according to the settings you have configured.
Note that Secure Recording is a feature that needs to be set up on individual machines where the Automation Anywhere Client is installed. It is recommended to enable Secure Recording on all machines where sensitive data may be accessed during automation tasks.
What is Credentials Vault in Automation Anywhere? What are advantages of using it.
Credentials Vault is a feature in Automation Anywhere that allows users to securely store and manage login credentials. Such as usernames and passwords for various applications and systems used in automation tasks.
Advantages of using Credentials Vault in Automation Anywhere include:
-
Improved security: Credentials Vault provides a secure and centralized location to store sensitive information. Such as login credentials, and helps prevent unauthorized access to the information.
-
Time-saving: Credentials Vault enables users to store login credentials for multiple applications and systems in one location. Eliminating the need to enter them manually every time they are required in an automation task.
-
Simplified maintenance: By storing login credentials in a central location, it is easier to manage and update them as needed. Changes made in the Credentials Vault automatically update all the tasks that use the credentials.
-
Audit trail: Credentials Vault provides an audit trail of who has accessed the stored credentials and when. Helping to maintain compliance with organizational policies and regulations.
-
Integration: Credentials Vault can be integrated with other security tools. Such as Active Directory or LDAP, making it easier to manage access rights and permissions.
Overall, using Credentials Vault in Automation Anywhere helps to enhance security, save time, and simplify credential management in automation tasks.
Explain the steps for creating Credentials in Automation Anywhere Control Room?
Here are the steps for creating Credentials in Automation Anywhere Control Room:
-
Log in to the Automation Anywhere Control Room as an administrator.
-
Navigate to the “Credentials” section from the left-hand menu.
-
Click on the “Create Credentials” button in the top right-hand corner of the screen.
-
Fill in the credential details, such as the credential name, username, password, and domain (if applicable).
-
Click on the “Create” button to create the credential.
-
Once the credential is created, you can configure additional settings for the credential, such as access permissions or expiry date.
-
You can also modify or delete the credential from the “Credentials” section.
Note: Depending on the version of Automation Anywhere Control Room. The steps for creating Credentials may vary slightly. Additionally, you may need to configure other settings. Such as access permissions or roles, to allow users or bots to access the credentials for use in automation tasks.


What is two-factor Authentication in Automation Anywhere? Explain the steps for enabling this feature.
Two-factor authentication is a security feature in Automation Anywhere. It’s adds an extra layer of protection to user accounts by requiring a second form of authentication in addition to a password.
Here are the steps for enabling Two-factor Authentication in Automation Anywhere:
-
Log in to the Automation Anywhere Control Room as an administrator.
-
Navigate to the “Settings” section from the left-hand menu.
-
Click on the “Security” tab and then click on the “Two-Factor Authentication” button.
-
In the “Two-Factor Authentication” dialog box, select the “Enable Two-Factor Authentication” checkbox.
-
Choose the type of second factor authentication you want to use, such as a Time-based One-Time Password (TOTP) or SMS authentication.
-
Configure the settings for the second factor authentication method you have chosen.
-
Click “Save” to save the changes.
After enabling Two-factor Authentication, users will need to enter their password as well as a second form of authentication to log in to Automation Anywhere.
Note that Two-factor Authentication is a security feature that needs to be set up on individual accounts in the Control Room. It is recommended to enable Two-factor Authentication for all users with access to sensitive information or critical automation tasks.

What is the difference between Bot creator and Bot runner role in Control Room?
A bot creator role is responsible for creating and designing Bots. While a Bot runner role is responsible for running and monitoring bots. Bot creators can design bots and upload them to Control Room, while Bot runners can execute and monitor these bots.
How does Automation Anywhere Control Room help in bot management?
Control Room provides a centralized platform for bot management. It helps in deploying bots to various environments. Scheduling bots to run at specific times, monitoring bot performance, and managing user access to bots and related resources.
What is the role of a Control Room administrator?
Automation Anywhere Control Room administrator is responsible for managing the Control Room environment. This includes managing user access, configuring security settings, managing bot deployments, and monitoring bot performance.
What are the security features available in Automation Anywhere Control Room?
Automation Anywhere Control Room provides various security features. Which includes role-based access control, encryption of sensitive data, secure communication protocols, and user authentication.
What is the difference between the Community Edition and Enterprise Edition of Automation Anywhere?
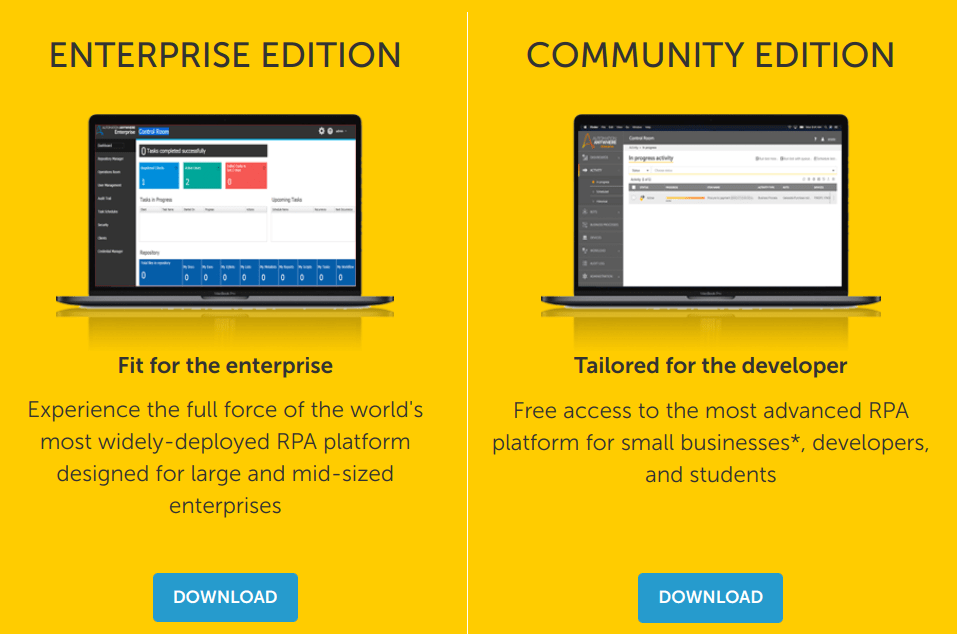
The Community Edition is a free version of Automation Anywhere that is available for personal and non-commercial use. While the Enterprise Edition is a paid version that is designed for enterprise-level use and provides additional features and capabilities.
Hope this will help you crack your next Automation Anywhere interview. You can also visit our other Blog Post based on other trending Technologies.