In this post, we are sharing our experience on Automation Anywhere Meta bots. You might have questions in your mind like What is Metabot? Or what is Metabot in automation anywhere? Use of Metabot in automation anywhere, What is Metabot Metabot designer, Metabot vs Task Bot, etc. This section would help you prepare for Automation Anywhere MetaBot interview questions and Answers.
Our blog on “automation anywhere metabot assessment answers” will help you on clear RPA Interview. You can also visit our YouTube Channel EasyWay2Learn to see training videos on RPA Realtime Projects for Automation Anywhere, UiPath and IQ Bot.
Automation Anywhere a360 Metabot Interview Questions & Answers
1. What is MetaBot in Automation Anywhere?
MetaBot is a reusable automation component that can be used to simplify and streamline the automation process. It allows developers to create a set of commands that can be used to automate a specific task, which can be saved as a single entity called a MetaBot.
MetaBot provides a graphical interface that allows developers to build and modify automation components easily without the need for coding. It also enables the reuse of automation logic across multiple automation projects, which reduces development time and maintenance costs.
Example: To automate Microsoft Outlook there is no direct command available in Automation Anywhere version 11. But with the help of Outlook Metabot, it can be done.
2. How do you create Automation Anywhere Metabot?
To create a MetaBot in Automation Anywhere, you can follow these general steps:
-
Open the Automation Anywhere client and navigate to the “MetaBots” section.
-
Click on the “New MetaBot” button to create a new MetaBot.
-
Give your MetaBot a name and description that reflects the task it will automate.
- Select Metabot Type as “Application Specific” or “All Applications” then click on Create.
-
Next, select the commands you want to include in your MetaBot by dragging and dropping them into the MetaBot canvas.
-
Use the “Edit” button to customize the commands as needed, such as adding or removing input/output parameters.
-
Once you have added and customized all the required commands, save the MetaBot.
-
Now you can use the MetaBot in your automation projects by dragging and dropping it into the workspace.
-
To use the MetaBot, you need to configure the input and output parameters, which are specific to the task you want to automate.
-
Finally, you can test and deploy the MetaBot to automate the task efficiently and accurately.
It is essential to thoroughly test the MetaBot before deploying it to ensure that it works as expected and meets your business requirements.


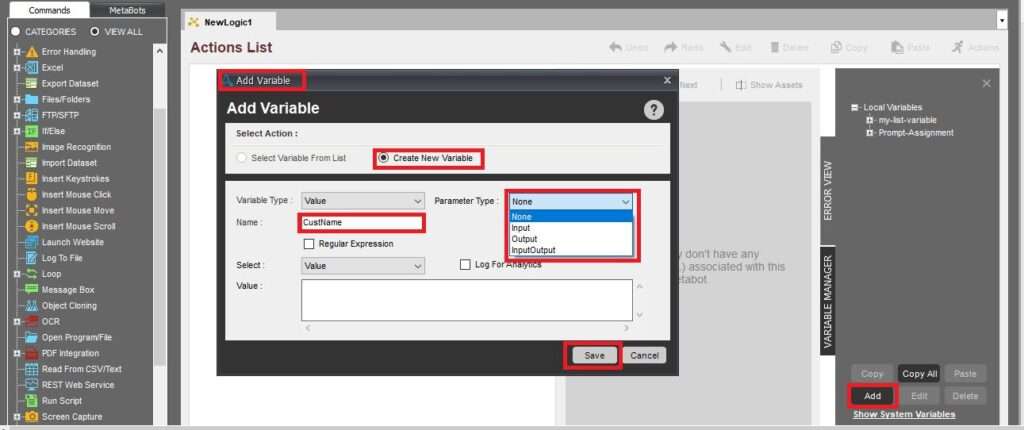
3. How to pass variables from Metabot to Task Bot?
To pass variables from a MetaBot to a Task Bot in Automation Anywhere, you can follow these steps:
-
In your MetaBot, create output parameters for the values you want to pass to the Task Bot.
-
In the Output Parameters window, create a new output parameter by clicking the “Add Output Parameter” button. Give it a name, data type, and default value if needed.
-
Once you have created the output parameters, save the MetaBot.
-
In your Task Bot, add an “Execute MetaBot” command to the task that uses the MetaBot.
-
In the Execute MetaBot command window, select the MetaBot you want to use, and click the “Input Parameters” button.
-
In the Input Parameters window, create input parameters for the values you want to pass to the Task Bot. Give them the same name and data type as the output parameters you created in the MetaBot.
-
Next, map the input parameters to the output parameters of the MetaBot. To do this, select the input parameter and click the “Map” button. In the Map window. Select the output parameter from the MetaBot that you want to map to the input parameter.
-
Once you have mapped all the input parameters, save the Execute MetaBot command.
-
Now, when you run the Task Bot, the output values from the MetaBot will be passed to the Task Bot as input variables, and you can use them in subsequent commands.
4. What is the extension of Metabot?
In Automation Anywhere, the extension of a MetaBot file is “.mbot”. When you create and save a MetaBot, it is saved as an .mbot file that you can later import into other Automation Anywhere projects.
You can also export a MetaBot as an .mbot file, which can be shared with other Automation Anywhere users or used in other automation projects.
5. How to create Metabot logic?
To create MetaBot Logic we need to go to the Automation Anywhere MetaBot designer window and select the Logic tab. In the logic tab, you can see add logic and record logic. In Order to create logic for individual steps select create logic. And if you want to record the steps for which you want to create logic you can select the Record Logic tab.
6. What is the use of Calibrate in MetaBot?
Metabot calibrate feature helps us on performing a comparison between existing screens with new screens to identify any changes that have been done or not in the screens. Generally, this used for web pages that change frequently. Based on calibrate results developer needs to make minimum changes in the code.
7. What is the difference between Automation Anywhere Task Bot and Meta Bot?
Task Bots – Task Bot is a tool used for automating repetitive tasks that follow a predictable pattern. It is a simple automation tool that can be used to perform tasks such as data entry, file transfers, and report generation. Task Bots are designed to work on a single application or process and can be scheduled to run at specific times or triggered by specific events. They are created by recording the user’s actions and then replaying them automatically.
MetaBot – MetaBot is used for automating more complex tasks that involve multiple applications or processes. It is a reusable automation component that can be used in different automation projects. MetaBots are created by building logic using pre-defined actions and commands from Automation Anywhere library of commands. MetaBots can be used to automate complex business processes such as order processing, data reconciliation, and workflow management.
8. How do you handle exceptions in a MetaBot?
Handling exceptions in a MetaBot is an important aspect of building a robust automation process. In Automation Anywhere, you can handle exceptions using the try-catch block in MetaBots. The try block contains the code that may throw an exception, and the catch block handles the exception that is thrown.
Here’s an example of how to handle exceptions in a MetaBot:
-
Open the MetaBot in Automation Anywhere Designer.
-
Identify the part of the MetaBot where an exception can occur. This may be due to errors in the input data or unexpected results from an application.
-
Place the code that may throw an exception in a try block.
-
In the catch block, specify the type of exception to catch and define how to handle it. You can log an error message, send an email notification, or execute another set of actions to resolve the issue.
-
Finally, execute the actions that need to be taken regardless of whether an exception was thrown or not in a finally block.
9. How do you manage version control in Automation Anywhere MetaBot?
In Automation Anywhere, you can manage version control for your MetaBots using the versioning feature provided in the Enterprise Control Room. This feature allows you to track the changes made to your MetaBot over time. Create and manage different versions of your MetaBot and roll back to a previous version if needed.
Hope this will help you crack your next Automation Anywhere interview. You can also visit our other Blog Post based on other trending Technologies.